PSO Asset Exports

gl_saber.PNG

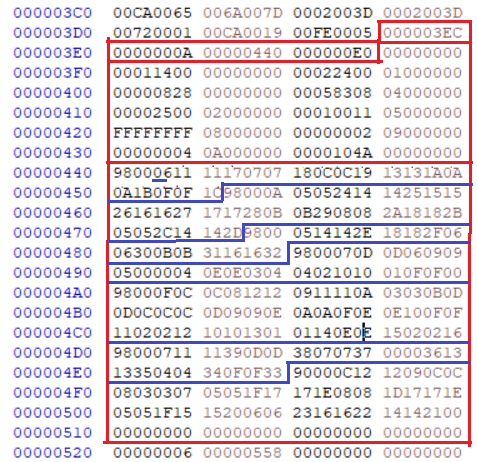
A closer inspection of this limited use-case seems to break down pretty quickly. The bytes 0x98 follows by 0x00 seem to declare a new strip. The first byte after the strip is the number of indexes. And from the there are three bytes, for pos, norm, uv. And this seems to go until 0x90 which seems to be the last strip, which follows the same pattern.
 
Well, fml. This strip format or strip formats are really giving me more trouble than they should. In principle these should be pretty straightforward, in-practice these are quite cumbersome.

I'll write what I think I know so far. For the saber, there seem to be two kinds of strips which start with 0x9800 and 0x9000 respectively. Specifically one could be a strip and the other could be a fan. As 0x9800 seems to include an implied triangle. And I haven't isolated 0x9000, so I'll have to take a look at that.

For format specifically, the faces are a list of indexed primitives. For example the model declares a list of attributes. In the case of the saber on the first bone, there are 25 positions, 25 normals and 58 uv's. So after the first short is declared for the strip, there is one byte for position, one byte for the normal and then one byte for the uv. And then this list makes up the face.

Problems that I'm running into:
1) This works on the saber, but for other models I get a lot of issues with the indexes being larger than the size of the attribute they reference
2) I keep getting missing triangles, and often 'pinching' for miss-indexed faces

I could be wrong, but it seems a little more complicated than 'read the indices', 'write the triangles'. Reading the indices is fairly straightforward, but the process of converting them into triangles seems to have some quirks.

Edit:
Found some of the index errors. There are two pointers to lists. Once of them seems to have the format pos, norm, uv, the other just has indexes for pos and norm.

Broken Items:
009 - 121
028
030
031
033
034
038
054
059
080
084
086
092
 
Last edited:
Kion, curveball here but perhaps a welcome break from the madness. Is there a 3D format that you have succesfully used to import 3D Models which include bones/armetures into 3DSMAX 3.1 or 2.5? Problem is whilst FBX is great for this, includes it's own and needed bloat. I cannot get it into any verison of 3DSMAX that the Ninja export works on without loosing the skeleton.
 
Kion, curveball here but perhaps a welcome break from the madness. Is there a 3D format that you have succesfully used to import 3D Models which include bones/armetures into 3DSMAX 3.1 or 2.5? Problem is whilst FBX is great for this, includes it's own and needed bloat. I cannot get it into any verison of 3DSMAX that the Ninja export works on without loosing the skeleton.

That's not too much of a curveball. When I got into exporting 3d stuff, I thought that parsing old formats without documentation would be the hard part, and there would be some modern format that I could port to.

Turns out it was the other way around, reading undocumented formats is a matter of taking your time and parsing the data that you can read, it's the existing 3d formats that are a complete cluster fuck.

I think GLTF has been introduced to try and get around this. There are a few key problems with GLTF, and I think one of the main ones is that it tries to be too many things to too many people, and it's rare that applications will completely support the specification, or will break even on 'properly' packaged GLTF files mainly because the file format is extremely flexible in how you can encode the data. Even between Threejs and Blender, which should be the bread and butter of an open-source formats, will break trying to go from one to the other.

Right now GLTF is on revision 2.0, and I think potentially with more feedback, a little more implication, and a better implication of materials could be the format that everyone centers around.

My approach has been a little different. Since I haven't found a file format that works consistently, I found that I've messed around with the scripting of enough 3d applications that I figured the easiest approach would be to create my own format and add support for applications. That way I wouldn't have to target some over complicated format that wouldn't be reliably supported anyways.

What I ended up creating is a model format, which is different from GLTF and FBX as those store an entire scene. The idea is that it forced a specific structure, png for textures, a specific struct for materials, one uv channel, skeleton, up to four weights and skeletal animation. The idea is that it won't do anything too crazy, but I should target what should be reliably supportable across a wide range of applications, and then based one what each application is capable of, and any potential feedback on the format I could slowly add in more features.

Or otherwise if someone wanted to make changes on the format for their own needs like adding in more UV channels, they could fork the format and have a base of export / import scripts for a wide variety of applications to start from.

Right now I have imports / exports working for Threejs and Noesis. And then I have partial imports working with Blender. And a 'To-FBX' converter which should work with the skeleton. And imports working for Unity. Adding more support for things like Godot / Maya / Matesequiosa / 3DS-max would probably balance out the support and make it a pretty killer format. It's mostly a matter for how much time I have to allocate to spend on these kinds of things.

Repo here: https://gitlab.com/dashgl/format/
 
morgue.PNG

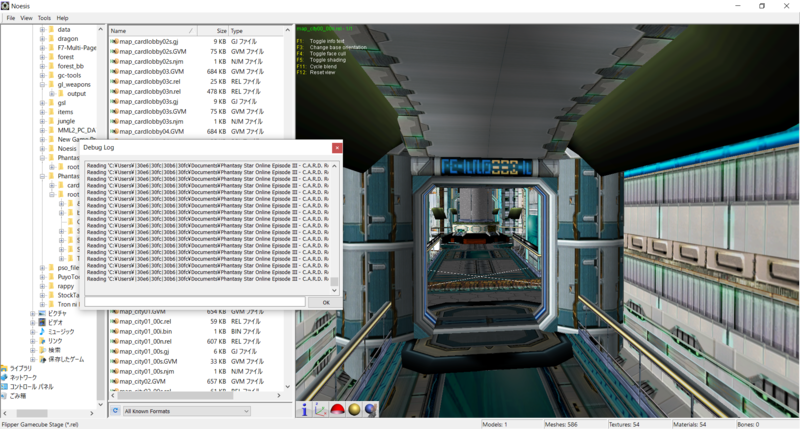
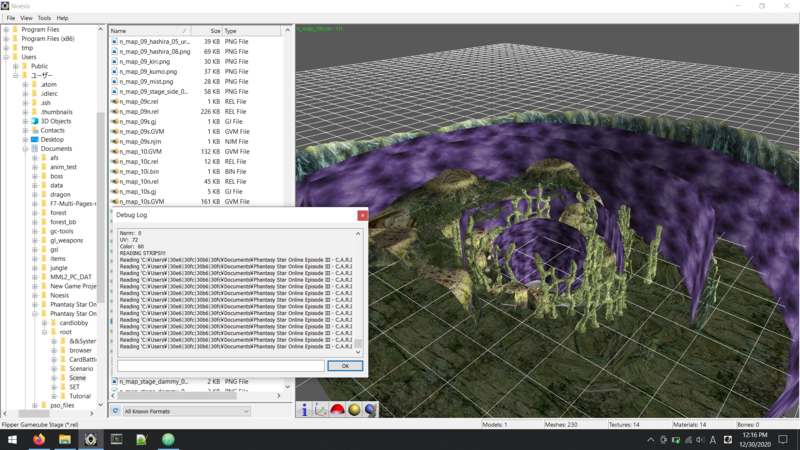
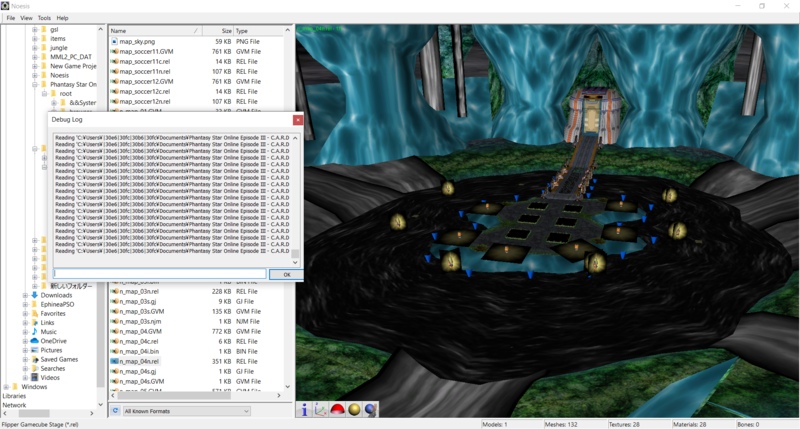
Okay, so episode 3 maps seem to be mostly working now. There are a lot of corners I've cut on the materials. Alpha blending, diffuse color, double sided and all of that other general kind of goodness has been ignored while focusing on the geometry part. Right now the only aspect of the material being applied is the texture id / texture name.

vortex.PNG
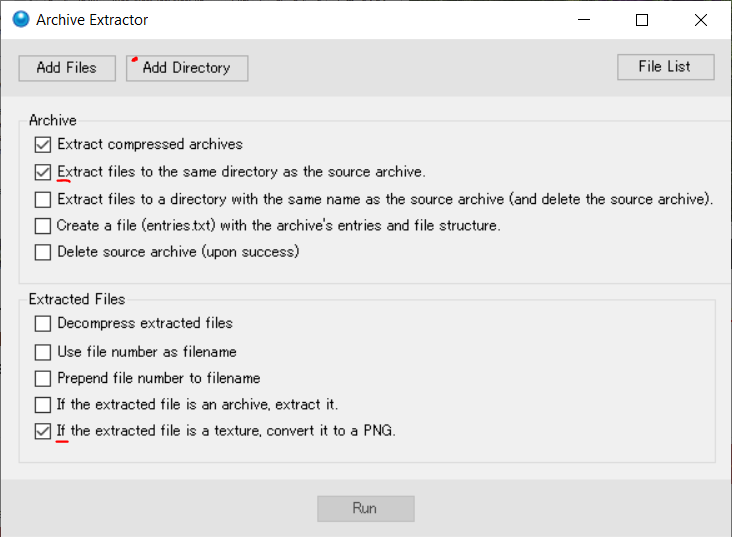
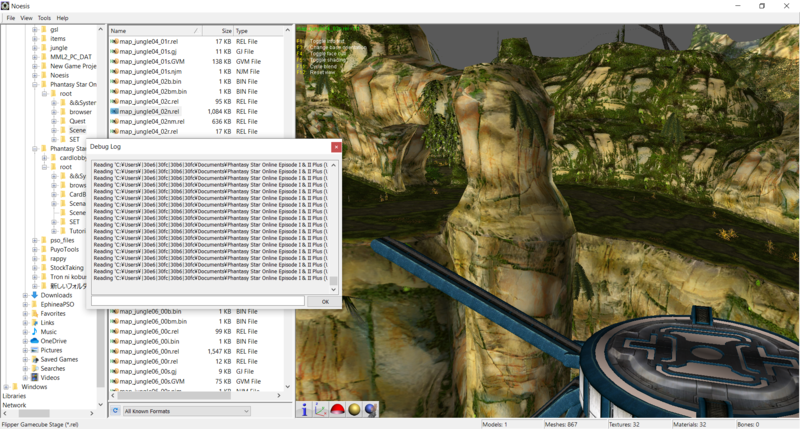
A few notes on how to use. To extract the files from the episodes 1&2 or episode 3 iso i used 'gc-tools' to extract all of the files. And I haven't had a lot of time to look into GVM/GVR textures or port them over from Puyotools. So to load in textures, open Puyotools, select 'Archive->Extract'.

puyotools.PNG

From there add your Scene directory, and then click the options to extract in the same directory, and convert textures to png. And that will export all of the textures in a way that can be referenced by Noesis. It looks like there are also some other tools for GSL and stuff here: https://github.com/fuzziqersoftware/gctools

Source Code is here:
https://gitlab.com/dashgl/ikaruga/-/snippets/2054452

It looks like the same format is used for Episodes 1 & 2, so next step will be to try and get some basic support for that.
 
A few notes on the Gamecube model format. The format seems to be best described as an indexed buffer geometry. What that means is that for a specific geometry, the game will declare a list of attributes that can consist of position, normals, vertex color or uvs.

Code:
        for attr in attrs:
            self.bs.seek(attr['offset'])
            for i in range(attr['count']):
                if attr['type'] == 'POS':
                    bytes = self.bs.readBytes(0x0c)
                    pos = noesis.vec3FromBytes(bytes, NOE_BIGENDIAN)
                    pos = self.bone['matrix'].transformPoint(pos)
                    self.pos.append(pos)
                elif attr['type'] == 'NORM':
                    bytes = self.bs.readBytes(0x0c)
                    norm = noesis.vec3FromBytes(bytes, NOE_BIGENDIAN)
                    norm = self.bone['matrix'].transformNormal(norm)
                    self.norm.append(norm)
                elif attr['type'] == 'COLOR':
                    r = self.bs.readUInt() / 255
                    g = self.bs.readUInt() / 255
                    b = self.bs.readUInt() / 255
                    a = self.bs.readUInt() / 255
                    color = NoeVec4((b, g, r, a))
                    self.color.append(color)
                elif attr['type'] == 'UV':
                    u = self.bs.readShort() / 255
                    v = self.bs.readShort() / 255
                    uv = NoeVec3((u, v, 0.0))
                    self.uv.append(uv)

For position and normals the data is in the format of a vector 3 (x, y, z) floats. Vertex colors are declared as four bytes in the order of bgra. And uv's are declared as a two byte short that is divided by 255.

As mentioned this is an indexed buffer format, so to draw the faces the game will provide a list of indexes referencing each position in its respective buffer to create a list of attributes to pass into the shader. Which specific attributes are defined by the material before the face list.

Code:
        if self.face_flags == 0x28:
            format = ['pos', 'norm']
        elif self.face_flags == 0x828:
            format = ['pos', 'norm', 'uv']
        elif self.face_flags == 0x888:
            format = ['pos', 'color', 'uv']
        elif self.face_flags == 0x8a8:
            format = ['pos', 'norm', 'color', 'uv']
        elif self.face_flags == 0x8fc:
            readShortA = True
            format = ['pos', 'norm', 'color', 'uv']
        elif self.face_flags == 0x08cc:
            readShortA = True
            format = ['pos', 'color', 'uv']
        elif self.face_flags == 0xc28:
            format = ['pos', 'norm', 'unknown1', 'uv']
        elif self.face_flags == 0xc88:
            format = ['pos', 'color', 'unknown1', 'uv']
        elif self.face_flags == 0xca8:
            format = ['pos', 'color', 'norm', 'unknown1', 'uv']
        elif self.face_flags == 0xccc:
            readShortA = True
            readShortB = True
            format = ['pos', 'color', 'uv']
        elif self.face_flags == 0xcfc:
            readShortA = True
            readShortB = True
            format = ['pos', 'norm', 'color', 'uv']
        else:
            print("New strip format, stopping")
            self.stop_trace = True
            return None

This is definitely not the cleanest way to write this, but without any forward knowledge of what any given bitflag is, i figured it would be easier to take each flag on a case-by-case basis and stop if a new flag or combination was found. That way I could open open the file, view that location and try to determine what that combinations was before moving on.

From what I can tell the flags seem to be as follows:
0x08 position (always present)
0x20 normals
0x80 vertex color
0x800 uv's

Then there seems to be flags:
0x400 adds an 'unknown' attribute into the face list. This value tends to be zero, so what I think this is an area for keeping track of animated textures
0x04 Seems to be used for declaring positions, normals, and colors as a short instead of a single byte in the list
0x40 Seems to be used for declaring uv and the 'unknown' attribute as a short instead of a single byte in the list

In the case of both 0x04 and 0x40 these bytes should be present when their respective attribute lists are longer than 255. But i think there was a situation where the uv list was longer than 255 and this bitflag wasn't set because the face list only used values 0 - 255.

For the faces themselves the game has two flags for setting the geometry type. 0x98 is a strip list and 0x90 is raw triangles. In the case of a strip list, the same pattern as the .nj models applies where the order is ABC BDC alternating until the end of the list. And the triangles are individual triangles which will always have a length divisible by 3. Following the type of geometry (triangles or strip) which will be a two byte value that gives the length of the list.

And then the list itself is made of list of indexed attributes given by the bitflags from the material model. One note that's interesting to mention is probably a result of porting the models, the index for the position, color and normals will always be the same. So for example in the case of the bitflag 0x828 a sample triangle might be A(01, 01, 05) B(02, 02, 24), C(03, 03, 17) where the position and the normal are the same index, and the uv is some other index.

The order of the attributes will always be in the order of the bitflags from low to high so, Position (0x08), Normals (0x20), Color (0x80), Unknown (0x400) and UV(0x800). And by default these indexes will be defined as bytes, unless the 0x04 and / or 0x40 bits are set. In which case those specific attributes will be defined as two byte shorts.

Last note, in the case of the flag 0xcfc, in think that might indicate that there is also a 0x10 flag, but i didn't notice any difference.
 
broken_ruins.PNG

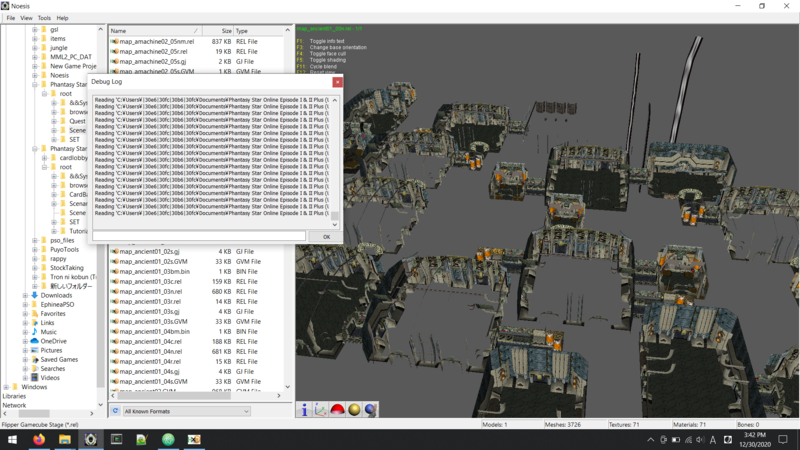
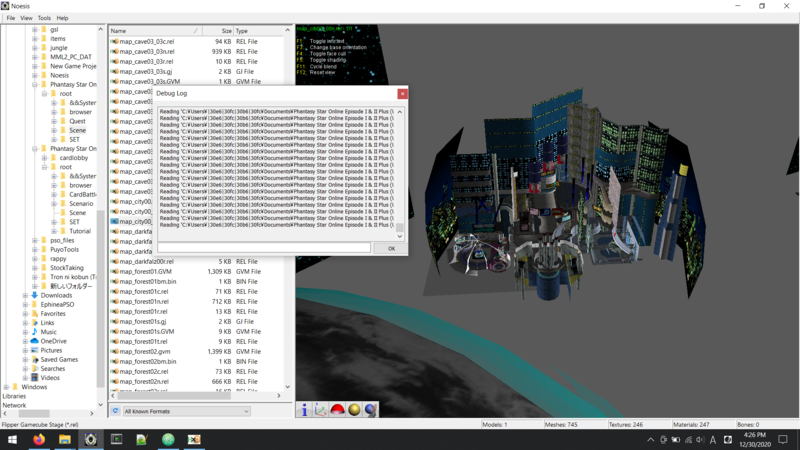
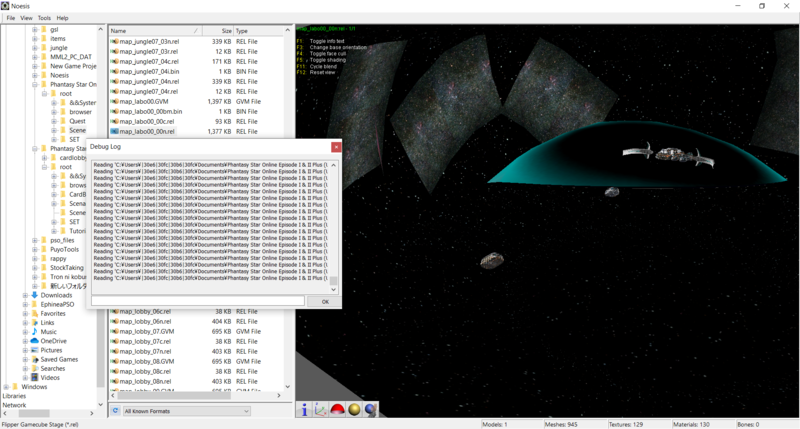
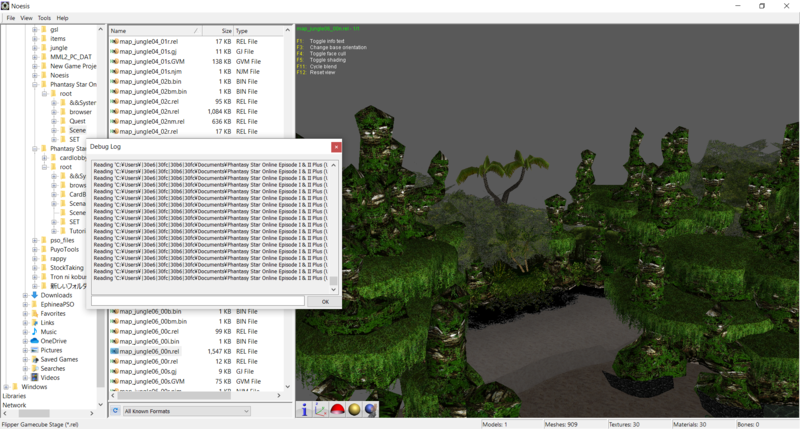
Well... fuck. I was hoping that since the Ep 3 maps are nearly working that the Episode 1&2 maps would "Just Work" (TM), but I guess that's not the case. So I guess that means we need to trace through any pointers we skipped over.

fmt1_header.PNG

We can start with the header, we have the text 'fmt1' followed by 0x40, not sure if that is a pointer or a count. Then we have the short 0x06 and the short 0x00. The 0x06 short should be the section count. Following that is and upper case 'D'. In the case of pso and psobb the text 'HD' or 'hd' will often be there. I'm not sure if this has any function besides existing. 0xFBC should be the pointer to the sections. And then 0x1CA8 should be the pointer to the texture list.

full_city.PNG

Okay, never mind. There wasn't anything new. My plugin was running into the "stop on new flag" code. I switched over to bitflags, so we'll see this works out. So far it's doing pretty well except for all of the crashes.

Code:
       if self.face_flags & 0x8:
           format.append('pos')
       if self.face_flags & 0x20:
           format.append('norm')
       if self.face_flags & 0x80:
           format.append('color')
       #if self.face_flags & 0x400:
       #   format.append('unknown1')
       if self.face_flags & 0x800:
           format.append('uv')

       if self.face_flags & 0x04:
           readShortA = True
       if self.face_flags & 0x400:
           readShortB = True
 
Has anyone got any Mags models?
I'm a beginner who is capable of getting models via Blender and NinjaRipper and I can only get small stuff (like Players, Weapons and Mags).
If nobody extracted the Mags, I'll do it since I'm grinding Mags to see all evolutions.
 
I've been continuing to refine my PSO exports. And I've made a little bit of progress. I've started an FTP server were I upload the files to (PM if your interested).

View attachment 9975
View attachment 9976

There aren't too many good options for managing assets.
.obj can't use bones or animations, and file sizes get large dispite it's lack of functionality
.dae I spent several months trying to use this, the problem is that a lot of programs don't support the most recent standard
.fbx requires the autodesk sdk to interact with, the most widely used but not exactly a great option to working with directly.
.gltf is one of the better ones, support is finally getting there, but supporting this format is a lot more time consuming than it needs to be.

So what I ended up doing is creating my own 3d format that I can support. Since in the end, files are a defined set of data that programs know how to read and write to. So the format I'm exporting to is the Dash File Format: https://gitlab.com/dashgl/format

Right now I have read and write working with Threejs and Noesis. So you have options to convert to with the formats those support. Loading is working in Unity, and I'm working with Blender and the FBX SDK to get these files working with the format.

So basically I can get the original PSO data parsed into an easy to read format, and then work on supporting that format, rather than trying to re-write the same tools for different platforms, over and over because lack of support for one thing or another.

Current File List:

(stages)

stg_cave_01_00.zip
stg_cave_01_01.zip
stg_cave_01_02.zip
stg_cave_01_03.zip
stg_cave_01_04.zip
stg_cave_01_05.zip
stg_cave_02_00.zip
stg_cave_02_01.zip
stg_cave_02_02.zip
stg_cave_02_03.zip
stg_cave_02_04.zip
stg_cave_03_00.zip
stg_cave_03_01.zip
stg_cave_03_02.zip
stg_cave_03_03.zip
stg_cave_03_04.zip
stg_cave_03_05.zip
stg_forest_01.zip
stg_forest_02.zip
stg_mines_01_00.zip
stg_mines_01_01.zip
stg_mines_01_02.zip
stg_mines_01_03.zip
stg_mines_01_04.zip
stg_mines_01_05.zip
stg_mines_02_00.zip
stg_mines_02_01.zip
stg_mines_02_02.zip
stg_mines_02_03.zip
stg_mines_02_04.zip
stg_mines_02_05.zip
stg_pioneer_2.zip
stg_ruins_01_00.zip
stg_ruins_01_01.zip
stg_ruins_01_02.zip
stg_ruins_01_03.zip
stg_ruins_01_04.zip
stg_ruins_02_00.zip
stg_ruins_02_01.zip
stg_ruins_02_02.zip
stg_ruins_02_03.zip
stg_ruins_02_04.zip
stg_ruins_03_00.zip
stg_ruins_03_01.zip
stg_ruins_03_02.zip
stg_ruins_03_03.zip
stg_ruins_03_04.zip
stg_spaceship_00.zip
stg_spaceship_01.zip
stg_spaceship_02.zip
stg_temple_00.zip
stg_temple_01.zip
stg_temple_02.zip
awesome! will use it to remodel everything i can
 
excuse me but how do i use format master?
i don't really understand how
i want to extract all the maps and work on them to modernise them to PS3 level
and i want to expand the Episode 3 C.A.R.D. revolution maps into full fledged levels to explore like PSO 1 & 2
apart from the conversion, what i have to do to export the maps have them shown?
thanks
 
Bro all this work is pretty AMAZING. I would be interested in a Forest1 file importable in unity to make a Sword and Sorcery mod, so you can actually "Play" forest 1 in VR (without the monsters, unluckily).
 
Back
Top