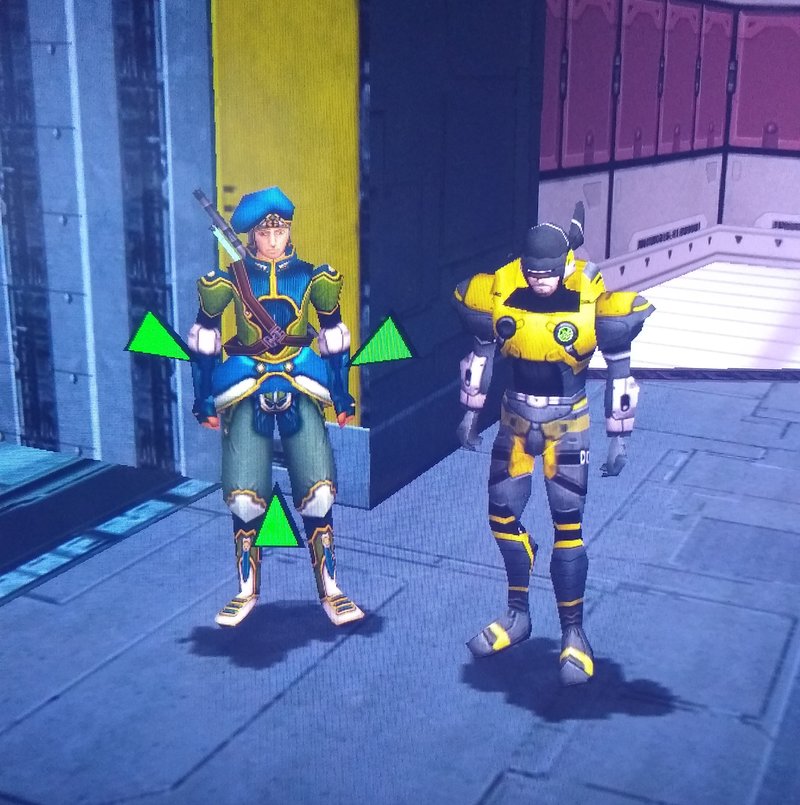
Kamui
S.
- Guildcard
- 42000828
Here is a quick tutorial regarding character model swapping.
Credit goes to Kra of course!
Firstly, you'll need AFS Explorer -> http://psoskins.jimdo.com/tools/
Open AFS Explorer and click "File" -> "Import AFS file" and load "plZsmpnj.afs" (can be found in your PSO/data folder)
You will see a list with 433 bin files, which can be divided into sections for each class.
Extract them all by hitting "Action" -> "Export folder" and choose a destination folder. The program will now create a new folder called FULL_AFS_FILE_DUMP with all the bin files in it. (You can also right click one particular file and export it btw, but it's easier to handle with a full dump if you want to experiment imo)
Now take a look at this:

Now take a look at these in order to give you a better idea of what you're working with here:


OK. Let's cut to the chase.
I will use my HUmar Dragoon as example.
As you can see HUcast's body files are the following:
-unnamed_33.bin
-unnamed_39.bin
-unnamed_45.bin
-unnamed_51.bin
-unnamed_57.bin
-unnamed_63.bin
In this example we want to have HUmar's body becoming a HUcast body, therefore we simply need to import these files accordingly.
Now right click "unnamed_1.bin" in AFS Explorer -> "Import" and choose "unnamed_33.bin" from your file dump list.
Continue with "unnamed_3.bin" and choose "unnamed_39.bin" and so on...
When you're finished, click "File" -> "Update" and choose your plZsmpnj.afs file.
Alright, we're done here.
Next we have to copy plCbdy00.nj and rename it to plAbdy00.nj. Easy one.
All there's left is swapping the body textures from HUcast (the ones within plCtex.afs) to HUmar (plAtex.afs) via Texture Manager. That's it.
Now it's all about your creativity, but beware, there'll be some weird stuff. For example it's not possible to create casts with fleshie heads. I mean it is, but casts don't have any hair files on them, hence they will be bald.
Oh and by the way, in case you can't import a file because you don't have enough reserved space, you can increase the maximum size by hitting "Advanced" -> "Modify reserved space" !!!
Well then, have fun.
Credit goes to Kra of course!
Firstly, you'll need AFS Explorer -> http://psoskins.jimdo.com/tools/
Open AFS Explorer and click "File" -> "Import AFS file" and load "plZsmpnj.afs" (can be found in your PSO/data folder)
You will see a list with 433 bin files, which can be divided into sections for each class.
Extract them all by hitting "Action" -> "Export folder" and choose a destination folder. The program will now create a new folder called FULL_AFS_FILE_DUMP with all the bin files in it. (You can also right click one particular file and export it btw, but it's easier to handle with a full dump if you want to experiment imo)
Now take a look at this:

Now take a look at these in order to give you a better idea of what you're working with here:


OK. Let's cut to the chase.
I will use my HUmar Dragoon as example.
As you can see HUcast's body files are the following:
-unnamed_33.bin
-unnamed_39.bin
-unnamed_45.bin
-unnamed_51.bin
-unnamed_57.bin
-unnamed_63.bin
In this example we want to have HUmar's body becoming a HUcast body, therefore we simply need to import these files accordingly.
Now right click "unnamed_1.bin" in AFS Explorer -> "Import" and choose "unnamed_33.bin" from your file dump list.
Continue with "unnamed_3.bin" and choose "unnamed_39.bin" and so on...
When you're finished, click "File" -> "Update" and choose your plZsmpnj.afs file.
Alright, we're done here.
Next we have to copy plCbdy00.nj and rename it to plAbdy00.nj. Easy one.
All there's left is swapping the body textures from HUcast (the ones within plCtex.afs) to HUmar (plAtex.afs) via Texture Manager. That's it.
Now it's all about your creativity, but beware, there'll be some weird stuff. For example it's not possible to create casts with fleshie heads. I mean it is, but casts don't have any hair files on them, hence they will be bald.
Oh and by the way, in case you can't import a file because you don't have enough reserved space, you can increase the maximum size by hitting "Advanced" -> "Modify reserved space" !!!
Well then, have fun.

